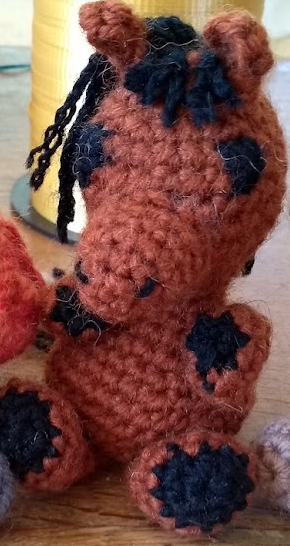
Brownie was the second pattern I made for the Christmas Gift Collection, and was made before I was properly making patterns completely from my own imagination, but still she was part of what got me started. I made her pattern basing it very strongly on the giraffe pattern from Amigurumi To Go, linked here.
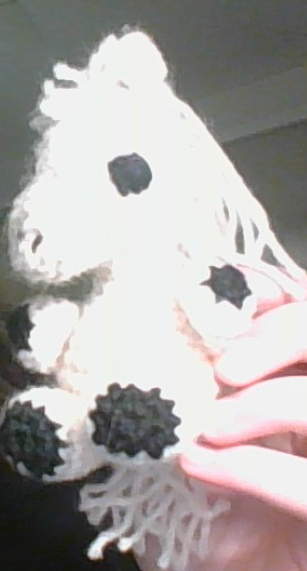
It was lots of fun making her, and experimenting with how to do the mane, and hoofs especially. I’m very glad that the little boy to whom this went asked me for a horse, and gave me the chance to challenge myself with this task. I made this pattern a second time, as a birthday present for a close friend with whom I had been writing a novel, this time I made her a white horse, to reflect the main characters from The Silver Brumby, a book series she had really enjoyed.
If you are struggling to understand how to assemble it, Amigurumi To Go included a video that you can use. I would have included more images to help with the completion of this pattern, except for the fact that this horse was given away before the Pen and Hook was even an idea of a future project.
Horse pattern
Supplies:
- Yarns of your choice, in three colours.
- 4mm to a 4.25mm hook
- blunt end yarn needle for sewing
- scissors
- polyester stuffing
- 9mm safety eye (optional)
- Round counter or safety pin to mark the beginning of the rounds.
Abbreviations:
- st= stitch
- sc= single crochet
- ch1 = chain 1
- sl st = slip stitch
- dec = decrease; crochet 2 stitches together
- inc = increase; crochet 2 stitches in the same stitch.
Horse pattern
Supplies:
Yarns of your choice.
4mm to a 4.25mm hook
blunt end yarn needle for sewing
scissors
polyester stuffing
9mm safety eye (optional)
Abbreviations:
st = stitch
sc = single crochet
ch1 = chain one
sl st = slip stitch
dec = decrease, crochet 2 stitches together
inc = increase, crochet 2 stitches in the same stitch
Muzzle: Colour A (Brown)
1) magic circle with 6sc (6)
2) (inc) x6 (12)
3-5) sc in each st (12)
sl st into the next stitch, fasten off.
Head and Body: Colour A (Brown)
Beginning at the top of the head and working down:
1) magic circle with 6sc (6)
2) (inc) x6 (12)
3) (1sc, inc) x6 (18)
4) (2sc, inc) x6 (24)
5-9) 1sc in each st for 5 rounds (24)
10) (2sc, dec) x6 (18)
If you have safety eyes sew the muzzle on now, (the top of it is round 5) and then fasten the eyes between rounds 6 and 7 on either side.
11) (1sc, dec) x6 (12)
12-14) 1sc in each st for 3 rounds (12)
15) (1sc, inc) x6 (18)
14) (2sc, inc) x6 (24)
Stuff and shape head.
15) 1sc in each st for 1 round (24)
16) (3sc, inc) x6 (30)
17-18) 1sc in each st for 2 rounds (30)
19) (3sc, dec) x6 (24)
20) (2sc, dec) x6 (18)
21) (1sc, dec) x6 (12)
Stuff the majority of the body
22) (2sc, dec) x3 (9)
Fasten off leaving a tail. Weave in and out of the stitches, pull tight.
Legs: (Make 2)
Using black.
1) magic circle with 6sc (6)
2) (inc) x6 (12)
3) change to brown (3sc, inc) x3 (15)
4) 1sc in each st for 1 round
5) (3sc, dec) x3 (12)
6) (2sc, dec) x3 (9)
7) 1sc in each st for 1 row
Stuff the first 4 rows of the foot
8) 1sc through both sides across to close up the leg
Fasten off leaving a long tail.
Arms: (Make 2)
Using black.
1) magic circle with 6sc (6)
2) Change to brown (inc) x6 (12)
3)(2sc, dec) x3 (9)
4) 1sc in each st for 1 round
stuff to the top edge of arm
5) 1sc through both sides to close up the arm
Fasten off leaving a long tail.
Ears: (Make 2): Colour A (Brown)
1) magic circle with 6sc (6)
2) sl st two stitches together to form a curled in shape.
Fasten off leaving a tail.
Assembly:
1) Sew on on the muzzle and stitch on the eyes if you haven’t already done so. The top of the muzzle should be just on row 5 with the eyes on either side.
2) Sew the ears onto the top of the head at about row 3.
3) Place the legs in a ‘V’ shape under the body so it will sit up, you may have to experiment with the placement a bit.
4) Sew the arms in place in the same way you attached the legs on either side of the body.
5) Mane: Measure out 8 pieces of black yarn, 10 cm (4 inches) in length. Pair lengths and fold in half, attach along the back of the head like tassels.
6) For the fringe at the front, take 6-8cm (2.3-3 inch) lengths and attach them, then trim to length.
7) Tail: Measure out 6 pieces of black yarn, 10 cm (4 inches) in length. Fold them in half and attach as you would a tassel.